Crochet Tips [5 Ways to Improve Your Crochet Projects]
So you have started creating your own custom stuffed animals and other crochet projects, but have noticed they just aren’t coming out exactly how you envisioned. Maybe there are some stitches that pucker or the face isn’t quite straight. I’ve been there and felt that frustration. There are dozens of tips and tricks that you will learn in your crocheting journey that will help you improve the finished quality of your projects. I am going to share with you five tips that I think are rarely talked about but are very important. If you are very new to crocheting I suggest you check out some of my other blogs that will be helpful as well.
Check out:
5 Tips to Improve Your Crochet Stuffed Animals
Fluff your stuffing
Secure safety eyes
Control your tension
Learn different ways to embroider details
Learn how to switch colors
Fluff Your Stuffing
This is something that often isn’t talked about and even more often overlooked, but it can totally change the outcome of your finished piece. Why is fluffing the stuffing so important? First, let me clarify what I mean. The plain PolyFil you get at the store is great and really easy to use for stuffing your projects. However, you shouldn’t simply pull it out of the bag and put it straight into your project. Take just a few seconds and pull it apart so it isn’t in dense clumps or bunches. Then stuff your project with equal amounts of fluffing. You don’t want one arm to be way bigger than the other. The reason you should pull apart the stuffing is that if you don’t after a little while the stuffing can get lumpy and make your project look lopsided. It is a really quick fix that will save your projects from looking frumpy.


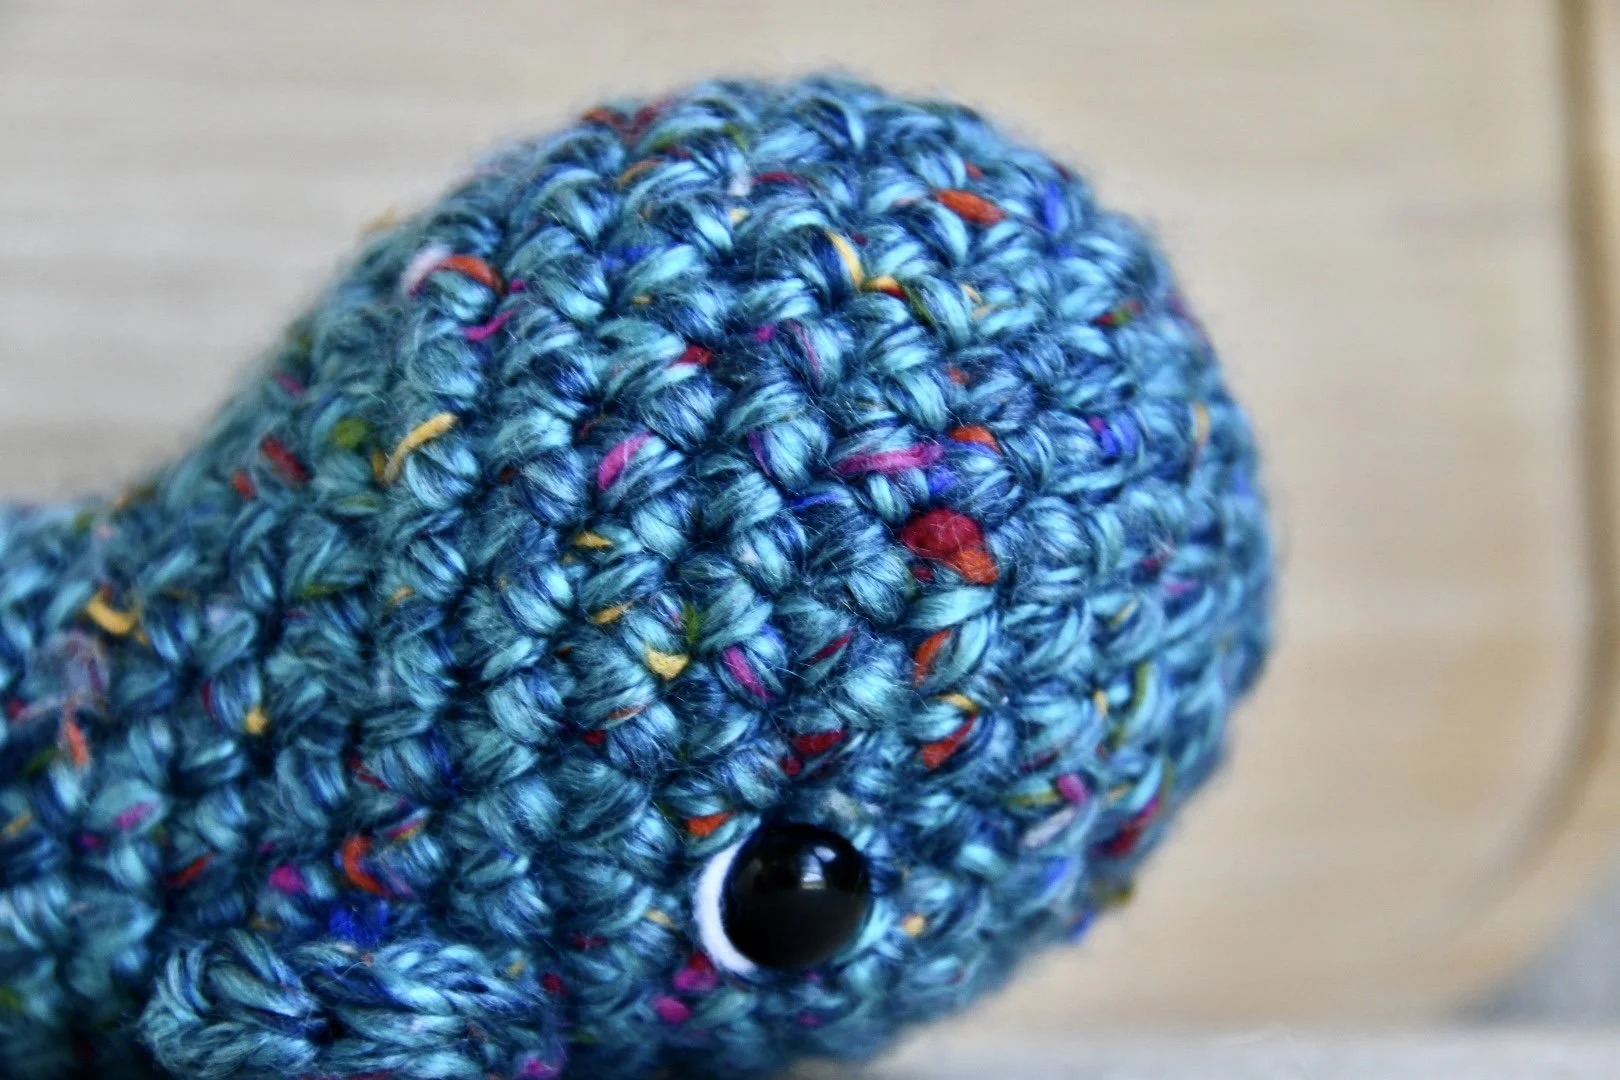
2. Secure the Safety Eyes
I think plastic safety eyes add a lot to the finished look of your crochet stuffed animals. I am definitely not the best at embroidering eyes to my projects (if you are then good for you! Keep it up!) so the plastic eyes are a very easy way to add detail. One thing to note is that they are small pieces that can be a choking hazard to young children. Just like store-bought stuffed animals you need to warn parents about the eyes. Safety eyes are already pretty sturdy by themselves, but one hack that I just learned is to put the eye together and then melt the end of the black piece with a lighter and push it down to make sure that the back cannot come off.


3. Work on Your Tension
Finding the right tension is absolutely vital to the success of your crochet projects, especially amigurumi. If your tension (how tight or lose you hold the yarn coming from the ball) is too loose you will have gaps between your stitches where stuffing can poke through. On the other hand, if your tension is too tight then you can end up with amigurumi projects that are smaller than the pattern stated. This is why it is important to do the test gauge! On this point, I am talking to myself as well! I hate doing the gauge it feels like a waste of time and yarn, but trust me it is important and shows you just how different your crocheting can be from other fiber artists. Another factor that can play into sizing issues is the size of the hook you use. The hook forces the stitch to be that size no matter how tight your tension is. If you switch hook size halfway through you will likely see a difference in the stitches.
4. Learn Different Embroidery Techniques
This is especially helpful for creating cute little mouths and noses for your projects. As I mentioned earlier I am not very good at embroidering; however, it can make a huge difference to the finished look of your crochet stuffed animals. Whether it is a smile, eyebrows, or a piece of white to add a glimmer to an eye it can make a big difference. Two of my favorites are the glimmer of an eye and a super easy mount.
To add a glimmer to an eye all you do is take some white yarn and trace around half of the plastic eye. If the eye is put on tight enough the white will rest right beside it creating a perfectly round shape. If the eye is a loot looser you might have to add a couple more anchoring stitches to keep it in place.
The white makes the eye stand out a little more, plus it adds a cute detail to the eye.
Second, to make a really quick and easy mouth grab some scrap yarn about five or six inches long. First, you are going to want to insert the darning needle into the side of the cheek a little to the side from where you want the mouth (see image 1 below). This will give you a clean inter and exit point to tie off your yarn. Second. bring the needle out of the plush where you want one end of the mouth to be and then put it back in at the other end. Right now you should have a straight line for the mouth (see image 2). Then you will make the needle come out right in the middle of the mouth, but also one stitch down (see image 3). When you pull the needle out make sure to thread it through the straight line of the mouth and then insert the needle back into the plush in the exact spot it came out (see image 4). Essentially you are creating a straight line for the mouth and then grabbing it with an anchoring stitch to make it into a “v” shape. Then push the needle back in and out in the exact same spot you started in (see image 5). Hopefully, the images help if not here is a video that is helpful.


5. Learn How to Switch Colors
When making custom stuffed animals you often need to switch colors so it helps to know how to do it in a way that is not only easy but also looks clean. You don’t want to have weird bunching or an extra stitch somewhere just because you change colors because it will make your project look less professional. There are several ways to switch colors including only putting the color into the back loops to create a clean line. However, the way I will be teaching you is the easiest and quickest way for me to color change while still looking clean so I use it ALL THE TIME. It is so simple! You literally do whatever stitch you were already doing the exact same except before you do your last yarn over and pull through you are going to pull the new color through in order to finish the stitch. Here is a really helpful example, however, it is in UK terms so remember it will be a little different than US terms.

For single crochet
Insert the hook into the stitch yarn over and pull through. Then before you yarn over again and pull through both loops to close the stitch you grab the next color and pull through the loops to close the stitch.
That’s it! Those are five helpful tips that often get over looked when creating custom crochet stuffed animals. I think all of these are pretty quick fixes that have a big impact on the finished look of your piece. If you found any of these helpful feel free to share this page with your friends or on social media! Until next time, happy crocheting!